Showing posts with label couture techniques. Show all posts

Monday, March 12, 2012

Couture techniques & a mystery netting

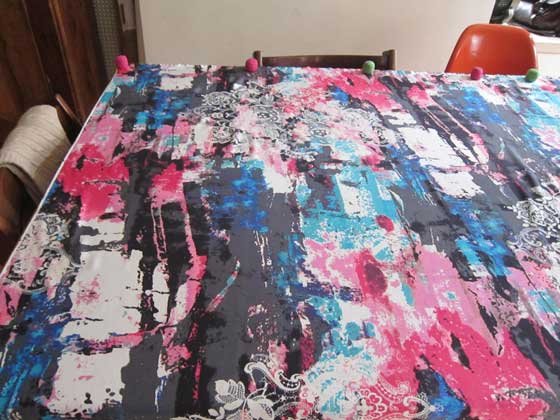
I am having very very busy days on all fronts, but today there is something I had to share with you! Look at this:


I was looking for this fabric  for months, on eBay, on Etsy, in online stores, in the Garment District. In vain. But last week I passed by one of my favorite stores and asked them if they had Swiss Illusion. - They had no idea what I was talking about. - Netting in flesh color, maybe? - They discussed it and said that they had an unidentified bolt in their storage, which may be what I was looking for.

Ten minutes later.... Yay! That was it, can you imagine! They said they had no idea what it was - a close-out piece that was bought along with bolts of other fabric. Well, I packed my three-yards of this this weightless treasure and hurried home.

So, what is it? I saw it for the first time in a beautiful vintage garment, and then, again, in Baltimore - Susan Khalje brought a small piece of it to demonstrate how she works with Chantilly or Alençon lace. She calls it Swiss Illusion -  a sheer but strong netting used as a lace underlay in mostly close-fitting styles.

Some of you may have used organza to underlay fragile lace, so you may ask what is the difference. Well, the main difference is that organza is a woven, and Swiss illusion is a knit. So, organza would give a stronger structure, while Swiss Illusion will remain some flexibility. Also, in my opinion, organza is more opaque than Swiss Illusion, so if you want to achieve that nude effect - use it.

This fabric is relatively expensive at $30 a yard, so, if you find it, use it sparingly. But for details, such as lace yoke, or sleeves - you won't need much, and a yard will take you a long way.


What about your readers, how, or do you underlay expensive lace. Share your thoughts!

Tuesday, October 11, 2011

Bouclé, Charmeuse and Quilting à la Chanel | Part 3


This is the final and the easiest part, readers! Today I will show you how to quilt the lining and bouclé for your Chanel-inspired garment. All the prep work is behind us, can you believe it?!

This part will take you an hour or two depending on how complex is your pattern. It took me an hour to quilt my 8-piece cape, and another hour or slightly less to clean up the thread ends and make tiny corrections. 

In the previous part we prepared our garment pieces for quilting and the layers of lining fabric, organza interfacing and bouclé were pinned or tailored-basted together. We took a break, good for keeping up your mojo high in non-sewing class conditions.

What you'll need now is:
  • Walking foot for your machine to make sure there is minimum shifting of fabric layers during quilting. (if you don't have a walking foot I would baste the layers together along quilting lines - this will cost extra time though)
  • For stitching, preferably silk floss, mercerized cotton, or embroidery thread (but polyester thread would do as well, actually)
  • Microtex needles. I am recommending a microtex needle for bouclés that have novelty threads, lurex etc inside - those are very nasty with a regular needle. If your boucle doesn't have those, you are fine with a Universal needle, but make sure the number is a compromise for bouclé and silk combination. I am sewing with #70 Microtex. 

STEP 1

Stitch along marked quilting lines! As easy as that! Leave your thread ends long, so you can tie them off comfortably (Step 2). 


A word of caution: do look where you start and finish - your quilted lines must start and end 1" (2.5cm) from the closest stitching line. We will need that space to accommodate seam allowances once your garment is assembled. 

Another word of caution: Don't backtack! I will show you a better and tidier method of securing your stitching lines in the next step


STEP 2


Remove pins or basting and give your quilted pieces a light steam press, using silk organza press cloth. Don't overpress it - just a light touch with a little steam would be enough - you don't want your bouclé look like pressed towel. 


loose thread ends
Fold back the edge portion of the lining to expose the end of the stitching line


Pull the thread ends between your fashion fabric and lining layers

I am not cutting it, just pulling the thread gently. You can also use a pin to help pull the thread.
both threads ends are between the layers
Tie off the thread ends and trim them. In her Thread's article "Inside a Chanel Jacket", Susan Khalje recommends using a stronger and more durable jeweler's knot to tie off the thread ends. To tie the know really close to the last stitch use a pin. 

First, make a knot loop using your fingers (as you would normally do it), but before you tie it off, place a pin inside the loop. 


Pull the thread with the pin inside the loop and move the pin as close to the last stitch as possible. Remove the pin, voilà. 

However, if this is too complicated, or if your thread ends are too short to make a jeweler's knot, use your regular double knot, just try to get it as close to the last/first stitch as possible. 

That's it! Finita la comedia! Farce is over, readers!

QUILTING AND SHRINKING

After I made my Chanel-inspired jacket, some of you asked me whether the garment pieces shrank after quilting. No. There was no shrinking. Shrinking is likely to happen if you quilt excessively, but with vertical lines every 1" or so, you should be fine. If you are not sure, however, do compare the quilted pieces to your muslin, or original paper pattern and adjust stitching lines, or any other markings accordingly.

NEXT STEPS

For my cape, I will be putting the pieces together as a next step. I am not sure how much interest this posts generate so I won't be making another tutorial for the assembly. But do let me know if you are interested. 

A new thing for me would be Chanel buttonholes. I must admit that I have never made hand-worked buttonholes, which scare  me a lot. And this cape does ask for some nice buttons, but that's a whole new story!..

If you missed previous parts of this tutorial, here are the links: {Part 1} {Part 2}. Also, check out my other tutorials and tips.

All the resources I used or referenced in this tutorial are listed in the Part 1. However, in my opinion, Threads Archive is the best resource for most of the techniques I use in my sewing, so if you can, do get a hold of it. Here is the link on Threads website. 

Now your turn, readers! Have you quilted bouclé before? Any tips, experiences you want to share? Do you think this technique is functional or just a gimmick?.. 

Wednesday, October 5, 2011

Bouclé, Charmeuse and Quilting à la Chanel / Part 2


Are you ready, readers? We are about to start with one of the most interesting sewing techniques, widely used by Chanel in her couture jackets.

Ok, I have told you before, I split this tutorial in several parts and this is Part 2 of 3, where we will cover cutting the lining and preparing it for quilting.


I have structured this tutorial so that each part needs to be finished in one session. Once you start this part you won't be able to remove your silk lining until it's pinned to the fashion fabric. So, depending on how fast you work, you will need two to three hours to complete this part. It's not difficult, really. 

BEFORE YOU START, make sure...
  • your fashion fabric is cut with 1" to 2" seam allowance (2" seam allowance is only necessary if your fabric frays like crazy; 1" is good for more stable weaves)
  • individual pieces are thread-traced
  • lengthwise grain is marked on all cut pieces. (you can skip this for plaids and stripes, just make sure you know which lines follow the lengthwise grain, as opposed to cross grain)
  • finally, have your (improvised) pattern weights, transparent ruler and silk pins ready! 
  • and, you will also need appr. 1/2 yard (slightly less than 0.5m) of silk organza, or equivalent amount of organza remnants for interfacing (more detailed instructions are below)
ADDING INTERFACING

I suppose, you have your silk organza ready? Sorry, why silk organza? It doesn't add bulk, and it is great for stabilizing and interfacing. Actually, feel welcome to contribute your ideas on silk organza while I am getting on with the tutorial.


I am using this huge triangle of silk organza from the times when I thought that making 1 yard of bias tape requires cutting a yard of silk organza into two triangle pieces and using only the longer  strips. What a waste! I really learned it hard way. Luckily, I did not throw the 'useless' triangle away. 

Why interfacing?
On my cape, I need to interface the top sections from my shoulders to approximately breast and shoulder blades level. I am doing it on all, front and back pieces. On my Chanel-inspired jacket I interfaced only the front, but here, the cape is not fitted, and it has a lot of fabric hanging from shoulders, which will carry all this weight and stretch over time. So, to avoid any future distortion on the upper portion of the garment, I decided to interface all pieces. 

How much?
The height of the interfacing piece is approximately the distance from shoulder line to the bust. The width will depend on the pattern piece.

So, if you are using a pristine piece of silk organza, just tear off two stripes, the width of which will be equal to your shoulder-to-bust measurement plus 1" seam allowance.


please, press your stripes before attaching them to fashion fabric!
Inserting interfacing


Disclaimer: I initially forgot to add interfacing. So, this image was in fact taken after the lining was cut. But it is much easier to do this step as in the tutorial - before the lining is cut - saves extra 15 min of your time.
Now, take your thread-traced pieces and pin organza to the top portion aligning the crosswise grain. If you have a plaid bouclé, just align the torn edge of your organza strip with the crosswise line of the plaid. Pin to seam allowances. Cut excess fabric. Baste along the seamlines.

Voilà!


PREPARING and GRAINING LINING FABRIC

I use a larger table to cut lining. My silk charmeuse was torn at cross grain, which gave me a pretty accurate guide for aligning the fabric. 

Tearing fabric along cross grain saves time required for graining. But you may ask, whether your (woven) fabric will respond well to it. Well, try to make a test. Cut a small nick in the selvedge, just where you would want it to be cut, and rip the lining gently. If it works well than you are fine. Otherwise, especially with very fine fabrics, you will need to pull out a thread from one edge to the other and cut along the gap line. 

Lay out your lining on a rectangular table, face down, aligning the cut/torn edge and one selvedge along two adjacent table edges. Of course, a cutting mat is perfect for this task, but you can also do without it.


You may now discover that, when  you lay out your charmeuse, or other silk lining, the non aligned edge of the lining behaves weirdly: pulling fabric, or not forming a perfect straight line. In this case, the culprit is the selvedge. Try cutting off the selvedge on both edges very carefully (just for the portion that you need to cut your lining pieces from). This should solve the problem.

Align your lining fabric along table edges again. Secure it with small pattern weights. 


LAYING OUT PATTERN PIECES

The most important thing here is the Grain! This is probably the most time-consuming and boring step. I hate this step and get anxiety attack every time I have to do it. So have a chocolate and put on some cheesy music. Think that once you are over with it the rest is super easy, really. 

1. Lay out fashion fabric pieces on lining
So, your lining fabric is laid out face down on the cutting table. You will now lay your cut fashion fabric pieces - not pattern pieces - on the lining fabric, face up. The reason is, that, once the layers are aligned and grained, we will just pin seam allowances together, and cut. Pins will hold the two layers together until they are quilted and ready to be assembled. 


2. I Will Measure, Yeah, Measure


When laying out cut fashion fabric (face up!) on lining fabric, all you need to do is think about the Grain! It must be already marked/thread-traced on your fashion fabric. Take your 2"-wide transparent ruler, and measure the distance between the silk lining selvedge (or the silk edge) and the grain line. I usually measure at the bottom of the grain line, then in the middle, and finally, at the top. If the piece is short, measure the distance only at the top and at the bottom. The distance to the edge should be the same along the grain. 


Carefully pin along the grainline of the aligned fashion fabric piece to join it with the silk lining. Try not to move fabric.

If your next piece is further from the edge of the lining fabric, measure distance to the grainline of the closest piece that had been already aligned.

3. Pin
Once you laid out all pieces on the grained lining, pin seam allowances, and cut the lining along the cutting edges of the fashion fabric pieces. 

4. Cut
Carefully remove the cut layers and put them on a flat surface.


5. Répétez s'il vous plait!
If you were not able to accommodate all pieces at once, you may need to repeat this step for the remaining lining. 

PREPARING FOR QUILTING

You will need: chalk marker (white), ruler, pins (or basting needle and thread), walking foot.

If you googled Chanel quilting, you may have found out that you can quilt lines, squares, trapezoids, circles, animal shapes... basically anything, as long as it follows the pattern on bouclé.

Now, dear sewing nerds! I mean, sorry, you are sewing nerds if you didn't give up on this tutorial! Dear sewing nerds, be disappointed, quilting vertical lines is absolutely sufficient to fulfill the function of quilting. Unless, you do want to torture yourself!

If your boucle pattern has defined vertical lines, you will quilt along those lines every 1" (2.5 cm). It is ok if the distance between lines is slightly wider or narrower.

If you are sewing with solid bouclé fabric, you will need to mark on it vertical lines, 1" apart, using a chalk and a ruler.

The lines start and stop 1" (2.5 cm) from the closest seamline! Use a marker to mark the starting and the ending point of your quilting line.


Now, let's STABILIZE FABRIC LAYERS....

... (a) MASOCHISTIC WAY


... using tailor basting to secure layers between your future quilting lines. This is a great method to conclude a very stressful day - some monotonous hand sewing! Add incense sticks, esoteric music and wait for that portal to open... 

... or (b) SANE WAY


...just pin between the lines, but please straighten the lining underneath your fashion fabric before!

Lay your prepared fabric flat until you are ready to quilt!

MAJQA, readers! Which is 'well done' in Klingon. Please, forgive me for any infantile statements - I am still sick!

Questions?

Monday, October 3, 2011

Bouclé, Charmeuse and Quilting à la Chanel


Ok, my quilting tutorial is an epic. Again. 

I somehow manage to produce annals on simplest things. Give me a catchstitch and I will return it with a PhD-worthy manual.

The same is happening here. And before I overload you with details, check out this quick intro on what you will need to quilt your bouclé à la Chanel.

How did I learn these techniques? First by reading Claire Shaeffer articles, book and instructions for her highly-coveted Vogue#8259 Chanel Jacket, which I was very lucky to find. I also took a Classic French Jacket Class with Susan Khalje, and the techniques I learnt there were very similar to those I learnt myself, but nothing, of course, can replace face-to-face learning experience. 

I am now working on my Colette Fall Palette cape, which I decided to make from a nice black and white even plaid bouclé I bought at Mendel and Goldberg. The cape is lined with printed silk charmeuse from Mood Fabrics. It was only natural to make it following Chanel techniques, instead of following Burda instructions, because I wanted to have a piece that feels luxurious, soft and warm, and, at the same time, a piece that would last longer. 

Techniques you will find here are a mix and modification from classes, publications and pattern instructions, see the resources at the end of this post. At the end of the post, you will find links to resources that go into depth about quilting. 

Ready?


FABRICS? OR, WHY I AM QUILTING…

I bought relatively loosely-woven bouclé for the cape. I (now) know that, after a while, some portions of the cape will sag if I don’t stabilize it. This will happen mostly to the upper part of the garment, since it carries the most weight. Excess fabric will show at the bottom part which will look like a bubble... 

So, the action plan is: quilting lining to boucle, and adding a layer of silk organza on the upper portion of pattern pieces as an interfacing - to further stabilize the fabric and the seams without adding bulk.

Here is what I am using for my project:
  • Wool bouclé 
  • Silk Charmeuse Lining – silk charmeuse is a very good choice for warmer garments. However, there are more choices for silk linings - I discussed some of them in my Burda Style guest post.
  • Silk Organza for interfacing. 

Got scrap organza? Never through away remnants of organza, or organza selvedge!!!! Never!!! You will need every square inch! Bigger pieces (5 to 10 sq. in.) are good for interfacing the area around armscye. Smaller, literally 1 sq. in. pieces, are great for interfacing buttonholes and button areas.


TOOLS & NOTIONS:
  • 2"-wide transparent ruler – is a must, since makes life so much easier 
  • WHITE chalk markerpen-style Clover chalk liners are the best I have tried. Never use yellow! It will leave permanent marks on your fabric.
  • Finest silk pins – you don’t want to leave marks on your precious silk
  • Japanese hand basting needles – for thread-tracing and basting
  • Silk thread in contrasting color for hand basting and thread tracing. Pulling out silk basting is much easier! 

QUILTING IS DONE BY MACHINE, and you will need…
  • A walking foot – you will struggle without, but still can try if you want on a scrap.
  • Silk floss, machine embroidery threador mercerized cotton for machine-quilting
  • Microtex needle - I am using Microtex because it works best with both, silk and bouclé, which often contains some novelty threads (Universal needle just could not pierce through the latter without breaking thread). #70 works great


RESOURCES:

As promised, here are some resources you may want to explore in addition to the upcoming tutorial:

Claire Shaeffer. The Comfortable Side of Couture: Practical techniques of Coco Chanel. First published in Threads Magazine, June/July 1989, Issue 23. Republished in The Best of Threads: Designer Techniques, Spring/Summer 2011 (Thread Archives contain several Chanel-related tutorials and articles by both, Claire Shaeffer and Susan Khalje).

Claire Shaeffer. Couture Sewing Techniques:Revised & Updated. Chapter: Applying Couture Techniques: The Quilted Lining (p. 195)

Vogue Patterns # 8259. Chanel-inspired jacket. Custom Couture by Claire Shaeffer. Here, the quilting is slightly different then in the other sources, but the pattern has great step-by-step instructions and the highly-coveted three-piece sleeve.

For hands-on experience, join Susan Khalje’s class Classic French Jacket, usually in Baltimore, MA, or Claire Shaeffer class in Palm Springs, CA.


Part II of the Quilting à la Chanel will include: 
  • Laying Out & Cutting Lining.
  • Adding Interfacing.
  • Preparing Layers for Machine-Quilting. 

I will post the second part on Wednesday - at the moment both, me and my 2-years old are still sick, so tomorrow a lighter treat:  trend report inspired by this week's Sew Weekly Challenge: Spanish Harlem.


That’s it for today, readers! Questions?


Thursday, June 16, 2011

The mystery package and what to use these weights for!


I promised you to reveal the contents of a package that arrived from the UK last week.  So, here it is:


Nope, there is no fancy fabric! What you see here is premium quality tie interfacing and two types of lead weights!

The supplies come from MacCulloch & Wallisa great UK-based tailoring supplies store and the only one I could find that sells quality tie interfacing. But more about ties later this month.

I wanted you to have a look at these weights! I have to admit - it will be my first! And I am going to use them for my linen skirt vent. It should help to prevent the vent from spreading too wide and standing stiff open after a while. I don't know how about you, but my skirt vents look very unsightly after just half a day in the office.

Lead weights are reportedely used in couture to weight vents or hems, especially for evening gowns. It is one of the heaviest metals on this planet and quite affordable for sewing projects, unless you go for gold or platinum, of course. In addition, lead lends itself well to shaping.  The latter is especially useful, because you will sometimes want to hammer the weight flat, so you can hide it in your hem inconspicuously – just handle it with gloves and a mask to avoid the health hazard, and wash your heads after you finished working with it.

More tips on working with lead: covering the weight in a fabric and sewing it into the hem will help eliminate the risk of lead poisoning, which happens through inhaling or ingesting the hazardous metal. And, of course, lead should be stored in a sealed plastic bag out of reach of children.

Have you used lead weights in your projects? Weighted vent tutorial, anyone?

Wednesday, May 11, 2011

Couture Techniques: Faced Waistband (Part I)

It seems, some projects never end; and this is especially true for couture projects... such as my red bouclé skirt, for example. It reminds me of Tolstoy's four-volume War and Peace, which we had to read and analyze at school for more than three months. My bouclé skirt may not be the finest literary achievement, but I swear, dear readers, what I learnt by making it could well be described in four volumes.

If you have read previous posts, I underlined the skirt in nice cotton batiste, not the usual silk organza. And since I wanted to know why batiste was better, I read several old Threads articles, Claire Shaeffer's and Susan Khalje's books before I came up with a decision. (Let me know if you are interested to hear more about my experience with underlining choice for bouclé.)

I also converted darts to ease, so the fabric pattern was not disturbed. I blogged about it here.

In addition, I quilted the fabric to the underlining to extend the life expectancy of the skirt by preventing sagging of this rather loosely woven bouclé. (Haven't blogged about it, since there will be more quilting projects coming up soon - this is so exciting, I can hardly keep it to myself. Ask me, ask me, please!)

So, what else is left? How much couture can you squeeze into one skirt? Honestly, the more I learn, the less I seem to know...

... There is this last thing with this skirt I wanted to share with you: the faced waistband.

This post is Part One of a two-part tutorial showing how to make a faced waistband. What you will read is the result of my experimenting using tips and instructions from Claire Shaeffer's Couture Sewing Techniques and from her article 'Facing Finesse' in the Issue 30 of Threads magazine, (which was also reprinted in Jackets, Coats and Suits from Threads).

It is really easy to make a faced waistband once you learnt the technique. There is more instruction, really, than work, so, do try it if it's new to you.

1. Choosing and preparing the interfacing

The choice of interfacing for a faced waistband includes sew-in hair canvas, petersham ribbon and other woven interfacings. Choose flexible interfacing to be able to shape it so it conforms to body contours. The more shaping is required (as for wide or shaped waistbands), the more flexibility you will need. So, for example, petersham ribbon will work fine with straight and narrow waistbands. In addition, interfacing needs to be crisp, especially for heavier fabrics. For my skirt, I chose sew-in hair canvas - it just felt right for this loosely-woven, somewhat bulky bouclé.

a) For one waistband, cut a strip of interfacing at least 3" wide (for 1"-wide waistband cut 3"-wide strip, and increase the width accordingly). For the length, take your waist measurement, if the skirt or the pants hit at the waist, and add 5" to get the final length. These 5" will provide some room for corrections as well as enough length for an underlap or overlap of the waistband.

b) Fold the strip in half lengthwise and zigzag it at appr. 1/4" from the edge. My zigzag width was 1/4", and the length 2.5 mm. Stitch two or three parallel lines, leaving the space of 1/4" between the stitched lines. Zigzag makes interfacing crisper preserving flexibility of the waistband.


As you see on this picture I have stitched six lines on a wider strip of fabric - I save time and get three interfacing strips of 1" to 1.25".

IMPORTANT: Before you cut a strip for your waistband, make sure you cut off the fold and any selvedges, so your waistband is equally flexible on all sides! 

I cut the wider strip into six strips of slightly different width.
I chose the narrowest (1") for the bouclé skirt.
2. Marking the fabric

This is another relatively fast and straightforward step. For bouclé, I decided to thread trace for the best visibility on bouclé. Uneven basting hand stitch is perfect for this purpose - it has shorter stitches on the wrong/ interfacing side, and longer stitches on the right side.

Mark waistband edges and seamlines at the top and at the bottom, as well as at the ends. Then proceed with side seams (perpendicular markings), center front and center back - this provides matching points for the final assembly.

The marked waistband from the right side. 
NOTE: The height of the finished waistband should be 1/4" wider than the height of the interfacing. This difference allows for the turn of the cloth. Generally, the bulkier is the fabric, the more allowance you should provide. 1/8" was a reasonable amount for this bouclé.

3. Attaching interfacing to the waistband

Now, place the interfacing on the marked waistband. Make sure that the turn of the cloth allowance is provided on all sides.


Next, pin the interfacing to the fabric (optional) and baste it using an even basting stitch. I made two rows of basting to secure the interfacing.


Wrap the seam allowances around the interfacing and baste in place.


Don't worry about the bulk at the ends of the waistband - the corners will be nicely mitered after the waistband is fitted.


Before you proceed, check whether the thread-traced seamlines of the waistband are exactly on the edge of the band.


4. Shaping & Preparing for fitting

Yay, we are almost done! Now let's press! Claire Schaeffer says pressing is important to set fibers of interfacing and fabric "so that they grab together". In addition, pressing helps shape the waistband to make it conform to body curves.

Surprisingly (for me), even with this narrow waistband, you will want to slightly ease its upper edge. I trust Shaeffer, and so I went for an additional 1/2". I must admit, I haven't measured it, but it seemed close to this number.

NOTE: Press the interfacing side of the fabric, not the right side!


Baste the waistband on top of the skirt seam allowances and make sure that the matching points align at the side seams, center front and center back.

The waistband basted to the skirt
A close-up of the waistband before the fitting
Et voila, we reached the end of the part 1 of the tutorial. I have four hours to catch up on some sleep before going to work this morning... And, by the way, I pricked my right thumb while I was working. Remember? It means 'joy at work', they say at Chanel! Let's see...

Saturday, April 30, 2011

Ten Reasons why you should get a copy of the revised Couture Sewing Techniques by Claire Shaeffer

Couture Sewing Techniques, Revised and Updated

The new and revised Couture Sewing Techniques is finally released and here is my list of  ten reasons why you should own it:

1. Better layout:
The layout is so much better! Text is set in different colors to differentiate the content, tips, pull-out boxes, blurbs. This dramatically improves the book navigation!

2. More Content:
over thirty more pages of content added as a result of the author's recent research.


3. More images:
Claire added more images to illustrate instructions, and they are invaluable!


4. Improved instructions:
Clearly marked step-by-step instructions for all processes of couture construction. If you own the previous edition, you know how the instructions were presented in run-on paragraphs making it difficult to use the book as a quick reference.

5. More how-to illustrations:

An example of a new illustration in Blouses and Dresses Chapter explains a step
in the construction of a blouse/skirt dress
6. Claire’s Hints:
Excellent short tips, mostly absent in the previous edition.

7. contemporary couture techniques from the worksrooms of Ralph Rucci and James Galanos

8. techniques by Mainbocher and Charles Frederick Worth
Shaeffer says in her acknowledgements that she worked on a research project that focused on Mainbocher and Worth. She seems to have added some of the new techniques as a result of this research


9. New chapter “Designing with Fabric”

Shaeffer introduced this chapter to demonstrate “a variety of design ideas and specific techniques to inspire you to use fabrics more creatively”.  A master of observation, Claire describes techniques used in haute couture garments by Antonio Canovas del Castilo,  Hubert de Givenchy, Chanel, Worth,  Hanae Mori, I. Magnin, Balenciaga, Victor Edelstein, These techniques are not necessarily obvious, but so easy to learn and to apply in your own garments. She focuses mostly on lace and stripes, but also covers other tricky fabrics which require special techniques to enable undisturbed design.

LACE
Seaming Lace to Lace: Lapped Seam, Buttressed Seam, Ribbon Seam
Seaming Lace to Fabric: Lace-on-fabrique Appliqué Seam, Applied Appliqué
Finishing Edges: Neckline Edges, Hems
Designing with Allover Lace Patterns:

STRIPES
Rearranging Stripes
Shrinking and Stretching
Pleats and Tucks
Cutting and Seaming

DESIGNING WITH OTHER FABRICS
Wrong Sides and Selvedges: for fabrics with attractive wrong side and selvedge
Designing with Prints and Patterns: Matching Fabric Patterns
Designing with Appliqué
Sheer Fabrics

10. Affordable price! 
Amazon's $15 for this most unique resource is a steal! I got my copy yesterday!

Thursday, April 28, 2011

Mending + Alterations à la Couture

Please, meet my mending pile:


I've deliberately put it in the middle of our library / sewing room to finally start mending these clothes. Some of them have been in this basket for a year, ouch.

So, I decided - truly a sewing exhibitionist - I will mend these garments using finest couture techniques, and keep you, dear readers, updated on my progress with tutorials on the techniques I used. Stay tuned for the first project tomorrow.

Socks à la couture, anyone?

Friday, April 22, 2011

Couture Techniques: finishing seam allowances

I wanted to share with you yet another step in the construction of my red wool boucle skirt. Without any intention, really, I ended up using several couture techniques. 

I used 1" seam allowance and underlined the skirt with matching cotton batiste to add some stability to the loosely woven boucle. This boucle is fraying badly so, in order to avoid shedding in public I had to finish the seams somehow. Serging was not an option - even though I normally avoid serging I did try it and, yes, it was too bulky AND stiff! I knew that a hand finish would be the best option, but I ruled out hand overcasting, because I needed a one-step finish that could accomplish both: finish the seams and tack them down to the underlining. I remembered Kenneth D. King and Susan Khalje using a catch stitch for precisely that purpose, and having had my inner couturier intuition confirmed by two major authorities in the couture sewing world, I decided to give it a try.

It works best if your garment is underlined, as in my case. Now, all I had to do is to sew through the seam allowances and the underlining and, voila, finished seams that won’t ravel or shift.

Seam allowances are finished and secured by hand without being stiff or bulky.
Here, the catch-stitched seam allowances provide additional support to a hand-picked zipper.
I also catch-stitched its edges to the seam allowances. 
Questions? Do you use a catch stitch in your sewing projects? 

Wednesday, April 13, 2011

Couture techniques: converting darts to ease

If you have a chance to compare couture garments with their ready-to-wear counterparts, or commercial sewing patterns, you will notice absence of many darts in the former, as if the fabric was shaped around body curves by some subtle magic.

Those who sew from commercial patterns know the inevitable bust or waist darts, for example. Those darts are inserted to ensure proper fitting for a variety of materials.

After some research on the subject, I found out that in Haute Couture, the darts are often converted to ease. This technique is especially effective with plaids and prints, because it helps preserve the uninterrupted pattern of a fashion fabric.

To use this technique you need to know fabric qualities as well as some construction basics.  Here, I am trying to summarize what I have learned from books, magazines and couture patterns.

When to use this technique?
  • On skirts or pants to eliminate some or all darts.
  •  On darts shaping bust.
  •  On darts shaping the back shoulder.
In addition, you may want to use the same technique to:

  •  Shape the back armscye.
  • Prevent gaping décolleté neckline
Do not try to use this technique to eliminate large, long-curved or cut-out darts. It is only suitable for relatively short and narrow darts, which usually run from the edge or the seamline.

What fabrics are suitable?

Most fabrics that shrink easily are suitable for this technique: soft woollen, crepe, jersey, or any pliant fabric.

I recently tried recently to convert a dart to easy on a loosely woven linen skirt but in vain. The patch I used for a trial was over pressed and, even though some fullness disappeared, the result was not good enough. I ended up using single-thread dart technique, which I described here.

I would recommend trying this technique on a practice scrap to see how your fabric responds to easing.

Step-by-step instructions:
  1. Mark the location of the dart.
  2. Measure the width of the dart and measure and mark the same amount on both sides of the dart along the seamline. This is the section that will be eased. (This width may vary, you may want to increase the length of the section if your fabric doesn’t shrink so well).
  3.  Machine-baste the easing section using 6 to 8 stitches per inch, or, if you want to have a true couture experience, make two rows of very tiny running stitches (by hand, of course). If your stitches will be too long, you might end up with pleats where you pressed.
TIP: use a hand-basting needle and a single ply of silk basting thread

Here is the skirt section I gathered for shrinking. I gathered entire front waist,  but I would recommend easing 3 x dart width for each eliminated dart.
4. Easing
Here the instructions may vary depending on the type of construction. If the easing section will be joined with another section where no ease is required (shoulder darts, bust darts) do the following:
a.     Baste the two sections together, leaving out the easing section.
b.     Adjust the fullness allowed by the dart to fit the other section by pulling up the gathering thread.

If you are easing darts on a skirt, or pants section with underlining, stitch the dart on the underlining:
a.     Stitch the dart on the underling.


b.     Baste the two sections together, leaving out the easing section on the fashion fabric.
c.      Draw up the gathering thread to adjust the fullness to fit underling section.

If you are easing on a garment section without any underlining or a section that
a.     Pull up the ease basting to the final length of the easing section: it will be the original length (3 x dart width) minus the dart width.

TIP: when pulling the gathering thread, place a pin at each end of the easing section within seam allowance and wrap the basting thread around each pin to avoid any further gathering or shifting of the fabric.

5. Finishing
a.     Distribute the ease evenly
b.     Shrink the ease with steam iron over a tailor’s ham or pressing mit with the wrong side up. When the excess fabric was shrunk and the section is smooth press without steam until the fabric is dry. Remove the fabric only after the section has dried and cooled down.
TIP: if the fabric is rather difficult to shrink, try gathering less at first and shrinking, than gathering more and shrinking again, until all excess fullness has been removed.


Be careful with crepe! Crepe should be pressed with a dry pressing cloth under the steam iron, or it will lose its characteristic texture! 

The skirt after all the excess fullness has been removed
I recommend trying this technique on a practice scrap first (right after cutting your pattern pieces) to see how it works. If you apply it on loosely woven wools, it is fast and fun!

P.S.: Log on next week to see the finished plaid boucle skirt, where I used this technique.


Fashion Design © 2012 | All Rights Reserved | About | Privacy Policy | RSS Feed