Let's continue my Blogiversary Party with this Custom Couture Pattern by Claire Shaeffer:
This pattern is V8621 (Size 14-20), and is still available on Vogue Patterns.
It is a vintage-inspired style with some really striking details, such as the keyhole neckline and raglan sleeve cut on back only. Additional style details include waist seam, bound buttonholes and welt pockets. Pattern includes both, couture and ready-to-wear construction methods. So, if you want to take on this project, leave a comment under this post by Sunday, November 6th, writing a line or two about your blog, or your favorite blog if you don't have one. The point is to learn more about each other! Don't forget to leave a URL!
As usual, the giveaway is open to all google friends, RSS subscribers, Twitter followers etc...
19th of October was Frabjous Couture Blogiversary and I owe you a giveaway party!
150 posts, 241 Google Friends and some 500 RSS Subscribers - thank you! You make my days!
So, let's celebrate! For the next 7 days, until next Friday, I will be hosting giveaways for my readers. I hope the things will find a good home!
And today, we are starting with this Wrist Pin Cushion, a brand child of Project Runway merchandising. Don't we all watch Project Runway... whether we hate or love it? I love it! Mostly for the critics part - it taught me quite a few things about my own clothes. But let's get back to the Giveaway:
The rules are, as usual, simple. The giveaway is open to all Google followers, RSS subscribers, Twitter followers, and so on.... To participate leave a comment under the respective giveaway post by Sunday, Novemebr 6th. The winner will be drawn on that day!
Good luck everyone! and don't forget to check in again to claim your prize!
Oh, and please, for this giveaway series, there is a little twist!!! Remember Tim Gunn's black bag???
Ok, when you comment, leave an address of your blog and write a sentence describing to other readers what makes it special or different from other blogs!Yay, long live self-promotion!If you don't have a blog, leave a twitter account address, or a link to your favourite blog with a short promotion sentence as well!
I sinned, readers. I cut my underlining and fashion fabric together!
Was it wrong? Well, when I took an underlining class with Sarah Veblen, I learned that underlining and fashion fabric must be cut separately.
You may ask, why? The answer is the grain. You may have aligned your lengthwise edges properly so the pattern can easily be laid out. However, your crosswise grain may be off, and you won't even notice it...
But listen to this story:
... I mentioned earlier that I was (am still) working on a fitted strapless guipure dress during the couture class in Baltimore. Once the inner foundation was fitted and constructed I had to cut the underlining for the guipure. The lace was grey and I wanted to use peach charmeuse to underline it. I wanted some shine to peak through the lace to make contrast between the background and the lace more evident, but charmeuse was too light for this relatively heavy lace. Crepe back satin, which is heavier than charmeuse, was not available in the color and was three times more expensive...
Here is the sneak peek of my dress at a more advanced stage - I was applying guipure lace to the charmeuse/muslin foundation and sculpting it over a tailor's ham for shaping.
By the way, some of you may have recognized the lace - I was considering it for another project but never dared to cut into it. Couture school last week was a perfect opportunity!
The solution was to back charmeuse with some heavier fabric, and so I decided to use plain muslin, or calico, for this purpose. Now, I was working on a time crunch. Finishing the dress was not my goal, but I wanted to learn as many techniques as possible. So, cutting two underlinings separately would take ages! I would have had to mark grain on both pieces, so when they were joined they would align perfectly. Imagine how much time would it take!
So, I decided to cut them together. I had a large rectangular table at my disposal, and so I grained the muslin layer first, aligning the lengthwise AND crosswise edges along the table edges. Then, I made sure that the charmeuse crosswise edge was indeed cut on crosswise grain. Next, I laid charmeuse over the muslin and carefully aligned all the pieces making sure both layers were smoothed out and grained.
Finally, I pinned the prepared muslin pieces to the two layers and cut them. Yay!
In my opinion, this was way more accurate than cutting both layers separately, because charmeuse is relatively tricky and moving it around without support is a recipe for disaster.
With muslin under the charmeuse I could easily cut it and move the pieces to my sewing table and thread-trace them!
If you decide to make it the same way, make sure to grain both the lengthwise AND the crosswise grain of both layers and align them accordingly!
By the way, I used the same technique for my Clover pants (the image above)!
And, yes, I am sure someone else has done it this way before I reinvented the wheel. I am still happy I found a shortcut. (ooups, another S* word - you are not supposed to have shortcuts in couture.)
It took me two days to unpack after the Couture week with Susan Khalje and a wonderful and truly international groups of couture enthusiasts and sewing nerds. We had participants from the US, Canada, Netherlands, South Africa... And one of the participants arrived with a bone crusher for all of us to try. I was not that brave, though... I will post a report on this Baltimore experience soon, readers. Right now I am taking care of my sick daughter, who needs a lot of attention and care :-)
Meanwhile, have a look at my new guest post on BurdaStyle: What's in the Grain?
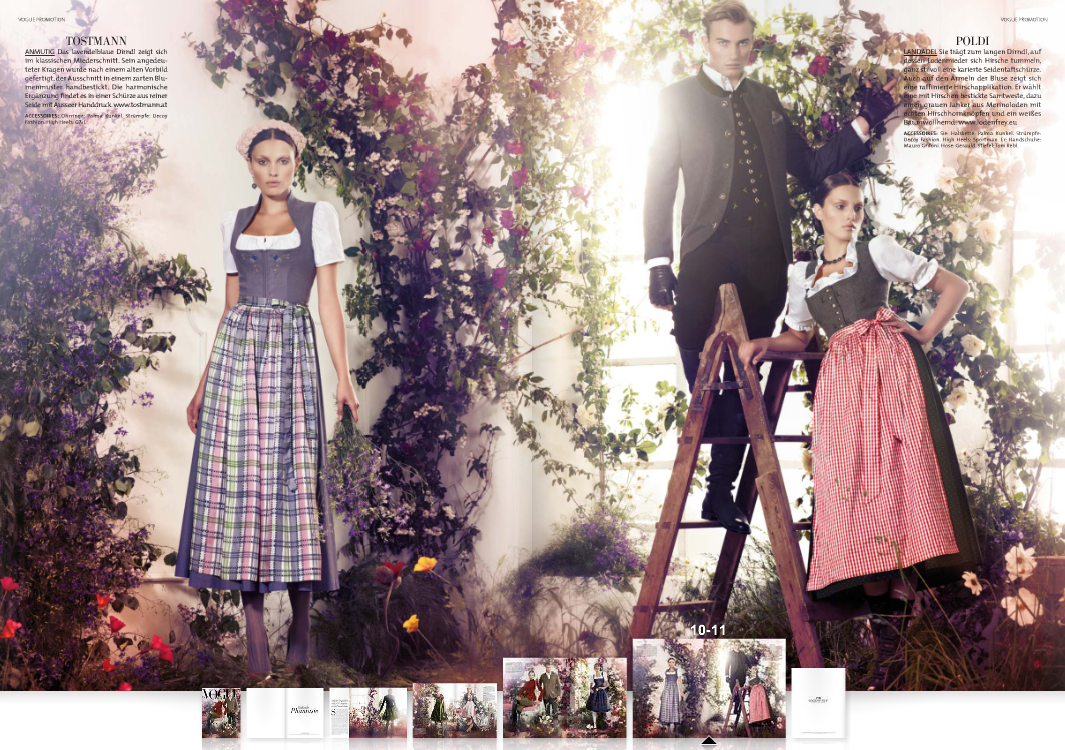
Oh, by the way, my Colette Fall Palette Challenge is moving along - I will have two garments to show you once I am in New York: Sencha and a teal silk skirt. The third, a cape, will have to wait since I was sidetracked by an unexpected homework from my daughter's school, which requested a national dress for this Friday. I had literally two half days to finish a German national dress, which was inspired by these two looks.
I initially wanted to make a dress, a blouse, an apron and a petticoat, but then I just managed to finish a dress and an apron, which was good enough as the rest could have been easily replaced with some ready-to-wear pieces we already had.
Today, my daughter is going to wear it and I am looking forward to pictures from my husband who is with her in New York. Meanwhile, I am finishing the second version of the inner foundation of my dress and will duly report to you about the progress!
You may have wondered what I am doing now, readers... I hope.
I am in Baltimore! Taking part in Camp Couture with Susan Khalje, of course. Again... You can't have enough of it, seriously!
I am working on a guipure lace dress with inner foundation and overlay organza dress inspired by this Louis Vuitton SS2012 number.
My lace is grey, however. And, there will be slight modifications to the overlay organza dress. Otherwise, pretty much close tot he look you see.
I spent two days working on my inner foundation and lace dress muslin, went through several fitting and construction steps, which I will be happy to report about once I am back to New York. My old laptop just doesn't want to upload images I took here.
Let me tell you a few words about the dress is going to be constructed.
Inner foundation
The inner foundation is essentially a corselet that extends below the waist, so it not only supports the strapless lace dress but also helps shape the area below the waist. After three kids, you know...
You basically make two corselets out of this cotton and then join the two layers together and treat them as one. Then you stitch two parallel lines 3/8" (1cm) apart for the boning, add hooks and eyes, insert boning and finish the neckline and the hem. Sounds complicated? Chack in for pictures early next week!
The problem is I initially bought matching cotton for inner foundation without realizing it was stretch cotton. And the sales person at the fabric store didn't mention it. I went on and, after three muslin fittings, made the foundation. I laid out one layer on lengthwise grain, and the other on crossgrain, hoping this will prevent the foundation from stretching. Nope... it didn't work. So, I went on today and bought a different non-stretch cotton at Jo-Ann's today. So, now I am going to start the foundation from the scratch - I hope I will finish it by the end of the day tomorrow....
Guipure dress
Now, the lace will be laid and shaped over silk charmeuse layer, which I decided to back with muslin to give the dress some support and structure. My guipure lace is relatively soft and I wanted to have a crisp look.
Right now, I got peachy charmeuse and muslin cut and basted together, so we can have final fit tomorrow before we lay the guipure lace over the underlining and tuck it to these two layers.
That's my plan for tomorrow.
I promise I will post detailed pictures of what I am doing! If you have any questions about construction of this dress or about inner foundation, post a comment - I would be happy to answer them or to ask Susan if I am not sure.
First thing! My blog does not contain malware! If you want to check the status of your blog or of any other blog, follow this Google Safe Browsing diagnostic link and type the blog URL you want to check in the following address:
The problem mentioned by several bloggers this week appears to be a link on their (and my) blogroll that redirect to a flagged blog. This is a screenshot of a malware alert I saw when I typed in the URL of the flagged blog:
In my case the culprit was a link to a flagged blog Making the Seam makingtheseam(dot)blogspot(dot)com (I am not linking to it here to avoid another malware message on my site). Of course, I had to remove this blog from my blogroll and this should stop any malware alerts generated when you visit my blog.
You will see the same message, if you add the link to this site using the diagnostic URL above you will see that the site is flagged as unsafe. Unless, of course, the owner has recovered the blog. By the way, see how the Alert message refers to the Google Safe Browsing diagnostic page? This is the link I included above.
Now, if your site is safe according to Google Diagnostics (check the link above using your blog URL), you can try using this experimental tool to see whether there is a link on your blog that links to a hacked blog, such as Making the Seam, for example. The tool will analyze the code of your blog and give you possible culprits. The tool works with Blogger blogs only. It seems to be a safe tool as it only accesses the publicly available code. It doesn't ask you to install any code on your blog or similar. For me it was the only available way to identify the problem-causing link.
Alternatively, if your blog is safe but generates a malware alert, you will see in the alert what site is causing this warning. If you haven't seen the alert yourself, but some of your readers told you about it, ask them to make a screenshot of it.
If your problems are more complicated, read this great post on further solutions. It is written by the author of the tool I referred you to.
Stay safe, readers, and let me know if you encountered any malware alerts recently!
This is the final and the easiest part, readers! Today I will show you how to quilt the lining and bouclé for your Chanel-inspired garment. All the prep work is behind us, can you believe it?!
This part will take you an hour or two depending on how complex is your pattern. It took me an hour to quilt my 8-piece cape, and another hour or slightly less to clean up the thread ends and make tiny corrections.
In the previous part we prepared our garment pieces for quilting and the layers of lining fabric, organza interfacing and bouclé were pinned or tailored-basted together. We took a break, good for keeping up your mojo high in non-sewing class conditions.
What you'll need now is:
Walking foot for your machine to make sure there is minimum shifting of fabric layers during quilting. (if you don't have a walking foot I would baste the layers together along quilting lines - this will cost extra time though)
For stitching, preferably silk floss, mercerized cotton, or embroidery thread (but polyester thread would do as well, actually)
Microtex needles. I am recommending a microtex needle for bouclés that have novelty threads, lurex etc inside - those are very nasty with a regular needle. If your boucle doesn't have those, you are fine with a Universal needle, but make sure the number is a compromise for bouclé and silk combination. I am sewing with #70 Microtex.
STEP 1
Stitch along marked quilting lines! As easy as that! Leave your thread ends long, so you can tie them off comfortably (Step 2).
A word of caution: do look where you start and finish - your quilted lines must start and end 1" (2.5cm) from the closest stitching line. We will need that space to accommodate seam allowances once your garment is assembled.
Another word of caution: Don't backtack! I will show you a better and tidier method of securing your stitching lines in the next step
STEP 2
Remove pins or basting and give your quilted pieces a light steam press, using silk organza press cloth. Don't overpress it - just a light touch with a little steam would be enough - you don't want your bouclé look like pressed towel.
loose thread ends
Fold back the edge portion of the lining to expose the end of the stitching line
Pull the thread ends between your fashion fabric and lining layers.
I am not cutting it, just pulling the thread gently. You can also use a pin to help pull the thread.
both threads ends are between the layers
Tie off the thread ends and trim them. In her Thread's article "Inside a Chanel Jacket", Susan Khalje recommends using a stronger and more durable jeweler's knot to tie off the thread ends. To tie the know really close to the last stitch use a pin.
First, make a knot loop using your fingers (as you would normally do it), but before you tie it off, place a pin inside the loop.
Pull the thread with the pin inside the loop and move the pin as close to the last stitch as possible. Remove the pin, voilà.
However, if this is too complicated, or if your thread ends are too short to make a jeweler's knot, use your regular double knot, just try to get it as close to the last/first stitch as possible.
That's it! Finita la comedia! Farce is over, readers!
QUILTING AND SHRINKING
After I made my Chanel-inspired jacket, some of you asked me whether the garment pieces shrank after quilting. No. There was no shrinking. Shrinking is likely to happen if you quilt excessively, but with vertical lines every 1" or so, you should be fine. If you are not sure, however, do compare the quilted pieces to your muslin, or original paper pattern and adjust stitching lines, or any other markings accordingly.
NEXT STEPS
For my cape, I will be putting the pieces together as a next step. I am not sure how much interest this posts generate so I won't be making another tutorial for the assembly. But do let me know if you are interested.
A new thing for me would be Chanel buttonholes. I must admit that I have never made hand-worked buttonholes, which scare me a lot. And this cape does ask for some nice buttons, but that's a whole new story!..
If you missed previous parts of this tutorial, here are the links: {Part 1} {Part 2}. Also, check out my other tutorials and tips.
All the resources I used or referenced in this tutorial are listed in the Part 1. However, in my opinion, Threads Archive is the best resource for most of the techniques I use in my sewing, so if you can, do get a hold of it. Here is the link on Threads website.
Now your turn, readers! Have you quilted bouclé before? Any tips, experiences you want to share? Do you think this technique is functional or just a gimmick?..
I know, I am probably the last one to make Sencha... So what? My plan was to finish the cape by the end of last week, but kids take turns in catching the same virus I started with... and my youngest is still at home with me! Have you tried sewing with 2-year old around? Such a project would be doomed, I tell you! The luxury of napping toddler is a rare treat and I enjoy this time finishing some hand sewing, tracing, basting, muslinning - basically anything that doesn't make noise. Luckily temperatures help not get upset about lack of cape - 29 degrees Celsius in New York.
So, to prove that I am working hard on my fall wardrobe, aka Colette Fall Palette Challenge (CFPC) here are rather mediocre images - it's past twelve and all I can think is finish the muslin and go to bed until my toddler wakes me up! She still doesn't sleep through!
You may ask, why I decided to make a muslin? Well, while everyone is praising this pattern, I find that quite a few projects I saw on the web have a pretty baggy back and high neckline. I will be doing Sencha in printed charmeuse, and I don't want to do any fitting with this rather finicky fabric... Here is your answer!
I traced the pattern - hate the absence of stitching lines, which adds another 30 minutes of prep work - and am going to put together the muslin. Will try to snap some pictures for you tomorrow.
I also thought that the pattern itself was rather scarce with regard to text markings - rather different from Big 4 and Burda patterns. As a beginner pattern, I think, it should say clearly which one is center back or center front, or which is grainline, etc. But maybe it is clear anyway. I had no problems whatsoever.
And look at those pretty curves on the image above! The shape looks very adorable already - I am looking forward to the results!
By the way, decisions to be made about seam finishes and facings... Anyone?
Readers, I am currently re-decorating my blog - like with clothes I do crave for some changes every now and then. The previous look was not what I liked very much, but I never had enough time to work on it. I am doing my changes live, so, in case you pass by during this design work, be patient, please.
As for upcoming posts, tomorrow, I will treat you with the Part 3 of the Bouclé Quilting Tutorial.
OMG, Rachel of House of Pinheiro has picked me and my blog for the Versatile Blogger Award! OMG!..
Who is Rachel??? Sorry, she is a cooking, sewing, quilting, rocking, 6-feet tall hot Brazilian bombshell! Quite an explosive mixture, I tell you! So, go, check her blog, readers!
Well, back to the award - I am supposed to share with you seven things about myself.
1.I grew up in Tbilisi, Georgia, which is a small country sandwiched between Russia in the north, and Turkey in the south.
this is my town - I miss it very much!
2.I dig dumplings!
These are Georgian dumplings, called Khinkali. They are very juicy inside and you must eat them by hand! You bite in and suck all that juice out and then you bite into the dumpling... Oooooh!.. I make the best ones, of course!
3.I have three kids! Did I say three???? When did it happen???
Anyway, I love them all and they keep challenging both me and Mr. Frabjous... well...
4.I was a pioneer in a Soviet Summer Camp.
That girl on the right with uneven white socks and striped vest is your humble blogger, ahem... The guy with his hand in his pocket (top right) is Lenin.... The camp was not that bad, actually... some propaganda gimmicks, but mostly common sense... yes... I guess...
5.I was the fastest in my class to put together and to take apart Kalashnikov. I am not a spy! Military Preparedness was one of the subjects we had to take at school and assembling Kalashnikovs was part of the craziness. Anyone remember the Cold War?.. how could people be so obedient to these absurd circumstances for decades is still a mystery to me...
6.I left my country when I was 23, after witnessing two short but horrible wars... I have been traveling since then, working in transition countries and promoting freedom of expression, and haven't found a place I can call home for longer than a few years yet. I think both, me and Mr. Frabjous, feel home pretty much everywhere - the US is our third country together.
7.I love the smell of the sea and of a dry fir forest. I love smelling things, vegetables, fruits, trees... fabrics?
8.I have a very neglected cooking blog, aka The Melting Pot. But I am planning to revive it this week, with some dumpling goodies!!!!.. It is called Melting Pot because it reflect my cooking influenced by the world cuisine. And, you have to check out Georgian food. It is amazing - I tell you!
Now, time for the nominations!!! Tah-dah!!!
I am supposed to nominate newly discovered blogs, so, no offense to my old-time favourites - I do love you!
Phew, done, Rachel! Because of you I failed to quilt four remaining panels for my cape. You got to face consequences, girl, bombshell or not! Am now off to pick up one of three demanding offsprings from school.
Are you ready, readers? We are about to start with one of the most interesting sewing techniques, widely used by Chanel in her couture jackets.
Ok, I have told you before, I split this tutorial in several parts and this is Part 2 of 3, where we will cover cutting the lining and preparing it for quilting.
I have structured this tutorial so that each part needs to be finished in one session. Once you start this part you won't be able to remove your silk lining until it's pinned to the fashion fabric. So, depending on how fast you work, you will need two to three hours to complete this part. It's not difficult, really.
BEFORE YOU START, make sure...
your fashion fabric is cut with 1" to 2" seam allowance (2" seam allowance is only necessary if your fabric frays like crazy; 1" is good for more stable weaves)
individual pieces arethread-traced
lengthwise grain is marked on all cut pieces. (you can skip this for plaids and stripes, just make sure you know which lines follow the lengthwise grain, as opposed to cross grain)
finally, have your (improvised) pattern weights, transparent ruler and silk pins ready!
and, you will also need appr. 1/2 yard (slightly less than 0.5m) of silk organza, or equivalent amount of organza remnants for interfacing (more detailed instructions are below)
ADDING INTERFACING
I suppose, you have your silk organza ready? Sorry, why silk organza? It doesn't add bulk, and it is great for stabilizing and interfacing. Actually, feel welcome to contribute your ideas on silk organza while I am getting on with the tutorial.
I am using this huge triangle of silk organza from the times when I thought that making 1 yard of bias tape requires cutting a yard of silk organza into two triangle pieces and using only the longer strips. What a waste! I really learned it hard way. Luckily, I did not throw the 'useless' triangle away.
Why interfacing?
On my cape, I need to interface the top sections from my shoulders to approximately breast and shoulder blades level. I am doing it on all, front and back pieces. On my Chanel-inspired jacket I interfaced only the front, but here, the cape is not fitted, and it has a lot of fabric hanging from shoulders, which will carry all this weight and stretch over time. So, to avoid any future distortion on the upper portion of the garment, I decided to interface all pieces.
How much?
The height of the interfacing piece is approximately the distance from shoulder line to the bust. The width will depend on the pattern piece.
So, if you are using a pristine piece of silk organza, just tear off two stripes, the width of which will be equal to your shoulder-to-bust measurement plus 1" seam allowance.
please, press your stripes before attaching them to fashion fabric!
Inserting interfacing
Disclaimer: I initially forgot to add interfacing. So, this image was in fact taken after the lining was cut. But it is much easier to do this step as in the tutorial - before the lining is cut - saves extra 15 min of your time.
Now, take your thread-traced pieces and pin organza to the top portion aligning the crosswise grain. If you have a plaid bouclé, just align the torn edge of your organza strip with the crosswise line of the plaid. Pin to seam allowances. Cut excess fabric. Baste along the seamlines.
Voilà!
PREPARING and GRAINING LINING FABRIC
I use a larger table to cut lining. My silk charmeuse was torn at cross grain, which gave me a pretty accurate guide for aligning the fabric.
Tearing fabric along cross grain saves time required for graining. But you may ask, whether your (woven) fabric will respond well to it. Well, try to make a test. Cut a small nick in the selvedge, just where you would want it to be cut, and rip the lining gently. If it works well than you are fine. Otherwise, especially with very fine fabrics, you will need to pull out a thread from one edge to the other and cut along the gap line.
Lay out your lining on a rectangular table, face down, aligning the cut/torn edge and one selvedge along two adjacent table edges. Of course, a cutting mat is perfect for this task, but you can also do without it.
You may now discover that, when you lay out your charmeuse, or other silk lining, the non aligned edge of the lining behaves weirdly: pulling fabric, or not forming a perfect straight line. In this case, the culprit is the selvedge. Try cutting off the selvedge on both edges very carefully (just for the portion that you need to cut your lining pieces from). This should solve the problem.
Align your lining fabric along table edges again. Secure it with small pattern weights.
LAYING OUT PATTERN PIECES
The most important thing here is the Grain! This is probably the most time-consuming and boring step. I hate this step and get anxiety attack every time I have to do it. So have a chocolate and put on some cheesy music. Think that once you are over with it the rest is super easy, really.
1. Lay out fashion fabric pieces on lining
So, your lining fabric is laid out face down on the cutting table. You will now lay your cut fashion fabric pieces - not pattern pieces - on the lining fabric, face up. The reason is, that, once the layers are aligned and grained, we will just pin seam allowances together, and cut. Pins will hold the two layers together until they are quilted and ready to be assembled.
2. I Will Measure, Yeah, Measure
When laying out cut fashion fabric (face up!) on lining fabric, all you need to do is think about the Grain! It must be already marked/thread-traced on your fashion fabric. Take your 2"-wide transparent ruler, and measure the distance between the silk lining selvedge (or the silk edge) and the grain line. I usually measure at the bottom of the grain line, then in the middle, and finally, at the top. If the piece is short, measure the distance only at the top and at the bottom. The distance to the edge should be the same along the grain.
Carefully pin along the grainline of the aligned fashion fabric piece to join it with the silk lining. Try not to move fabric.
If your next piece is further from the edge of the lining fabric, measure distance to the grainline of the closest piece that had been already aligned.
3. Pin
Once you laid out all pieces on the grained lining, pin seam allowances, and cut the lining along the cutting edges of the fashion fabric pieces.
4. Cut
Carefully remove the cut layers and put them on a flat surface.
5. Répétez s'il vous plait!
If you were not able to accommodate all pieces at once, you may need to repeat this step for the remaining lining.
PREPARING FOR QUILTING
You will need: chalk marker (white), ruler, pins (or basting needle and thread), walking foot.
If you googled Chanel quilting, you may have found out that you can quilt lines, squares, trapezoids, circles, animal shapes... basically anything, as long as it follows the pattern on bouclé.
Now, dear sewing nerds! I mean, sorry, you are sewing nerds if you didn't give up on this tutorial! Dear sewing nerds, be disappointed, quilting vertical lines is absolutely sufficient to fulfill the function of quilting. Unless, you do want to torture yourself!
If your boucle pattern has defined vertical lines, you will quilt along those lines every 1" (2.5 cm). It is ok if the distance between lines is slightly wider or narrower.
If you are sewing with solid bouclé fabric, you will need to mark on it vertical lines, 1" apart, using a chalk and a ruler.
The lines start and stop 1" (2.5 cm) from the closest seamline! Use a marker to mark the starting and the ending point of your quilting line.
Now, let's STABILIZE FABRIC LAYERS....
... (a) MASOCHISTIC WAY
... using tailor basting to secure layers between your future quilting lines. This is a great method to conclude a very stressful day - some monotonous hand sewing! Add incense sticks, esoteric music and wait for that portal to open...
... or (b) SANE WAY
...just pin between the lines, but please straighten the lining underneath your fashion fabric before!
Lay your prepared fabric flat until you are ready to quilt!
MAJQA, readers! Which is 'well done' in Klingon. Please, forgive me for any infantile statements - I am still sick!
I somehow manage to produce annals on simplest things. Give me a catchstitch and I will return it with a PhD-worthy manual.
The same is happening here. And before I overload you with details, check out this quick intro on what you will need to quilt your bouclé à la Chanel.
How did I learn these techniques? First by reading Claire Shaeffer articles, book and instructions for her highly-coveted Vogue#8259 Chanel Jacket, which I was very lucky to find. I also took a Classic French Jacket Class with Susan Khalje, and the techniques I learnt there were very similar to those I learnt myself, but nothing, of course, can replace face-to-face learning experience.
I am now working on my Colette Fall Palette cape, which I decided to make from a nice black and white even plaid bouclé I bought at Mendel and Goldberg. The cape is lined with printed silk charmeuse from Mood Fabrics. It was only natural to make it following Chanel techniques, instead of following Burda instructions, because I wanted to have a piece that feels luxurious, soft and warm, and, at the same time, a piece that would last longer.
Techniques you will find here are a mix and modification from classes, publications and pattern instructions, see the resources at the end of this post. At the end of the post, you will find links to resources that go into depth about quilting.
Ready?
FABRICS? OR, WHY I AM QUILTING…
I bought relatively loosely-woven bouclé for the cape. I (now) know that, after a while, some portions of the cape will sag if I don’t stabilize it. This will happen mostly to the upper part of the garment, since it carries the most weight. Excess fabric will show at the bottom part which will look like a bubble...
So, the action plan is: quilting lining to boucle, and adding a layer of silk organza on the upper portion of pattern pieces as an interfacing - to further stabilize the fabric and the seams without adding bulk.
Here is what I am using for my project:
Wool bouclé
Silk Charmeuse Lining – silk charmeuse is a very good choice for warmer garments. However, there are more choices for silk linings - I discussed some of them in my Burda Style guest post.
Silk Organza for interfacing.
Got scrap organza? Never through away remnants of organza, or organza selvedge!!!! Never!!! You will need every square inch! Bigger pieces (5 to 10 sq. in.) are good for interfacing the area around armscye. Smaller, literally 1 sq. in. pieces, are great for interfacing buttonholes and button areas.
TOOLS & NOTIONS:
2"-wide transparent ruler – is a must, since makes life so much easier
WHITE chalk marker – pen-style Clover chalk liners are the best I have tried. Never use yellow! It will leave permanent marks on your fabric.
Finest silk pins – you don’t want to leave marks on your precious silk
Japanese hand basting needles – for thread-tracing and basting
Silk thread in contrasting color for hand basting and thread tracing. Pulling out silk basting is much easier!
QUILTING IS DONE BY MACHINE, and you will need…
A walking foot – you will struggle without, but still can try if you want on a scrap.
Silk floss, machine embroidery threadormercerized cotton for machine-quilting
Microtex needle - I am using Microtex because it works best with both, silk and bouclé, which often contains some novelty threads (Universal needle just could not pierce through the latter without breaking thread). #70 works great
RESOURCES:
As promised, here are some resources you may want to explore in addition to the upcoming tutorial:
Claire Shaeffer. The Comfortable Side of Couture: Practical techniques of Coco Chanel. First published in Threads Magazine, June/July 1989, Issue 23. Republished in The Best of Threads: Designer Techniques, Spring/Summer 2011 (Thread Archives contain several Chanel-related tutorials and articles by both, Claire Shaeffer and Susan Khalje).
Vogue Patterns # 8259. Chanel-inspired jacket. Custom Couture by Claire Shaeffer. Here, the quilting is slightly different then in the other sources, but the pattern has great step-by-step instructions and the highly-coveted three-piece sleeve.
For hands-on experience, join Susan Khalje’s class Classic French Jacket, usually in Baltimore, MA, or Claire Shaeffer class in Palm Springs, CA.
Part II of the Quilting à la Chanel will include:
Laying Out & Cutting Lining.
Adding Interfacing.
Preparing Layers for Machine-Quilting.
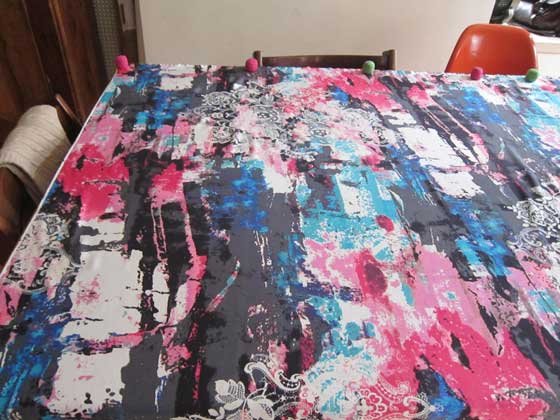
I will post the second part on Wednesday - at the moment both, me and my 2-years old are still sick, so tomorrow a lighter treat: trend report inspired by this week's Sew Weekly Challenge: Spanish Harlem.