Ok, I have told you before, I split this tutorial in several parts and this is Part 2 of 3, where we will cover cutting the lining and preparing it for quilting.

I have structured this tutorial so that each part needs to be finished in one session. Once you start this part you won't be able to remove your silk lining until it's pinned to the fashion fabric. So, depending on how fast you work, you will need two to three hours to complete this part. It's not difficult, really.
I have structured this tutorial so that each part needs to be finished in one session. Once you start this part you won't be able to remove your silk lining until it's pinned to the fashion fabric. So, depending on how fast you work, you will need two to three hours to complete this part. It's not difficult, really.
BEFORE YOU START, make sure...
- your fashion fabric is cut with 1" to 2" seam allowance (2" seam allowance is only necessary if your fabric frays like crazy; 1" is good for more stable weaves)
- individual pieces are thread-traced
- lengthwise grain is marked on all cut pieces. (you can skip this for plaids and stripes, just make sure you know which lines follow the lengthwise grain, as opposed to cross grain)
- finally, have your (improvised) pattern weights, transparent ruler and silk pins ready!
- and, you will also need appr. 1/2 yard (slightly less than 0.5m) of silk organza, or equivalent amount of organza remnants for interfacing (more detailed instructions are below)
ADDING INTERFACING
I suppose, you have your silk organza ready? Sorry, why silk organza? It doesn't add bulk, and it is great for stabilizing and interfacing. Actually, feel welcome to contribute your ideas on silk organza while I am getting on with the tutorial.

I am using this huge triangle of silk organza from the times when I thought that making 1 yard of bias tape requires cutting a yard of silk organza into two triangle pieces and using only the longer strips. What a waste! I really learned it hard way. Luckily, I did not throw the 'useless' triangle away.
Why interfacing?
On my cape, I need to interface the top sections from my shoulders to approximately breast and shoulder blades level. I am doing it on all, front and back pieces. On my Chanel-inspired jacket I interfaced only the front, but here, the cape is not fitted, and it has a lot of fabric hanging from shoulders, which will carry all this weight and stretch over time. So, to avoid any future distortion on the upper portion of the garment, I decided to interface all pieces.
How much?
The height of the interfacing piece is approximately the distance from shoulder line to the bust. The width will depend on the pattern piece.
So, if you are using a pristine piece of silk organza, just tear off two stripes, the width of which will be equal to your shoulder-to-bust measurement plus 1" seam allowance.

 |
| please, press your stripes before attaching them to fashion fabric! |
Inserting interfacing
 |
Disclaimer: I initially forgot to add interfacing. So, this image was in fact taken after the lining was cut. But it is much easier to do this step as in the tutorial - before the lining is cut - saves extra 15 min of your time. |
Now, take your thread-traced pieces and pin organza to the top portion aligning the crosswise grain. If you have a plaid bouclé, just align the torn edge of your organza strip with the crosswise line of the plaid. Pin to seam allowances. Cut excess fabric. Baste along the seamlines.
Voilà!
PREPARING and GRAINING LINING FABRIC
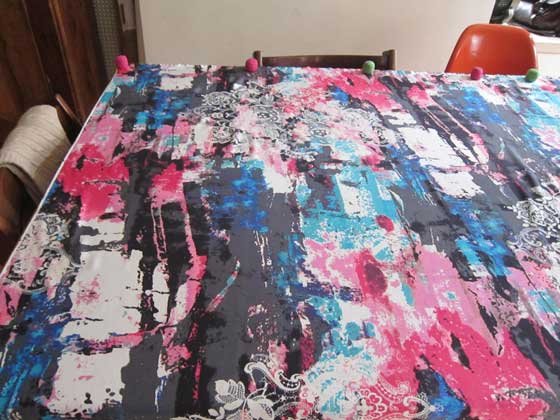
I use a larger table to cut lining. My silk charmeuse was torn at cross grain, which gave me a pretty accurate guide for aligning the fabric.
Tearing fabric along cross grain saves time required for graining. But you may ask, whether your (woven) fabric will respond well to it. Well, try to make a test. Cut a small nick in the selvedge, just where you would want it to be cut, and rip the lining gently. If it works well than you are fine. Otherwise, especially with very fine fabrics, you will need to pull out a thread from one edge to the other and cut along the gap line.
Lay out your lining on a rectangular table, face down, aligning the cut/torn edge and one selvedge along two adjacent table edges. Of course, a cutting mat is perfect for this task, but you can also do without it.
You may now discover that, when you lay out your charmeuse, or other silk lining, the non aligned edge of the lining behaves weirdly: pulling fabric, or not forming a perfect straight line. In this case, the culprit is the selvedge. Try cutting off the selvedge on both edges very carefully (just for the portion that you need to cut your lining pieces from). This should solve the problem.
Align your lining fabric along table edges again. Secure it with small pattern weights.
LAYING OUT PATTERN PIECES
The most important thing here is the Grain! This is probably the most time-consuming and boring step. I hate this step and get anxiety attack every time I have to do it. So have a chocolate and put on some cheesy music. Think that once you are over with it the rest is super easy, really.
1. Lay out fashion fabric pieces on lining
So, your lining fabric is laid out face down on the cutting table. You will now lay your cut fashion fabric pieces - not pattern pieces - on the lining fabric, face up. The reason is, that, once the layers are aligned and grained, we will just pin seam allowances together, and cut. Pins will hold the two layers together until they are quilted and ready to be assembled.

2. I Will Measure, Yeah, Measure
When laying out cut fashion fabric (face up!) on lining fabric, all you need to do is think about the Grain! It must be already marked/thread-traced on your fashion fabric. Take your 2"-wide transparent ruler, and measure the distance between the silk lining selvedge (or the silk edge) and the grain line. I usually measure at the bottom of the grain line, then in the middle, and finally, at the top. If the piece is short, measure the distance only at the top and at the bottom. The distance to the edge should be the same along the grain.

Carefully pin along the grainline of the aligned fashion fabric piece to join it with the silk lining. Try not to move fabric.
If your next piece is further from the edge of the lining fabric, measure distance to the grainline of the closest piece that had been already aligned.
3. Pin
Once you laid out all pieces on the grained lining, pin seam allowances, and cut the lining along the cutting edges of the fashion fabric pieces.
4. Cut
Carefully remove the cut layers and put them on a flat surface.

5. Répétez s'il vous plait!
If you were not able to accommodate all pieces at once, you may need to repeat this step for the remaining lining.
PREPARING FOR QUILTING
You will need: chalk marker (white), ruler, pins (or basting needle and thread), walking foot.
If you googled Chanel quilting, you may have found out that you can quilt lines, squares, trapezoids, circles, animal shapes... basically anything, as long as it follows the pattern on bouclé.
Now, dear sewing nerds! I mean, sorry, you are sewing nerds if you didn't give up on this tutorial! Dear sewing nerds, be disappointed, quilting vertical lines is absolutely sufficient to fulfill the function of quilting. Unless, you do want to torture yourself!
If your boucle pattern has defined vertical lines, you will quilt along those lines every 1" (2.5 cm). It is ok if the distance between lines is slightly wider or narrower.
If you are sewing with solid bouclé fabric, you will need to mark on it vertical lines, 1" apart, using a chalk and a ruler.
The lines start and stop 1" (2.5 cm) from the closest seamline! Use a marker to mark the starting and the ending point of your quilting line.
Now, let's STABILIZE FABRIC LAYERS....
... (a) MASOCHISTIC WAY

... using tailor basting to secure layers between your future quilting lines. This is a great method to conclude a very stressful day - some monotonous hand sewing! Add incense sticks, esoteric music and wait for that portal to open...
... or (b) SANE WAY

...just pin between the lines, but please straighten the lining underneath your fashion fabric before!
Lay your prepared fabric flat until you are ready to quilt!
MAJQA, readers! Which is 'well done' in Klingon. Please, forgive me for any infantile statements - I am still sick!
Questions?
...just pin between the lines, but please straighten the lining underneath your fashion fabric before!
Lay your prepared fabric flat until you are ready to quilt!
MAJQA, readers! Which is 'well done' in Klingon. Please, forgive me for any infantile statements - I am still sick!
Questions?

1 comments:
Hey I read this over nine years later ... thank you so much! I just quilted a very loose fraying bouclé and it worked perfectly with your tips :)
Post a Comment